I’m not much of a pro when it comes to editing photos. I’m not too sure what I’m much of a pro at to think of it :) I wanted to find a program that was inexpensive and simple to use to make my photos look even better. Getting my Sony DSC-RX100 was a great decision to take much better quality photos, but I felt they could look even better with a little tweaking. I own Adobe Photoshop CS6 Extended – Student & Teacher Edition but it’s such a big program, it’s taking me a while to learn all the tools. A few weeks ago I came across Adobe Photoshop Lightroom 4
and I couldn’t be any happier with a program that I’ve yet to master. The price was pretty reasonable at only $79, so after doing the trial period, I jumped in. I thought I’d show a few photos that I played around with to show you the results of just sliding a few sliders left and right and clicking “Export.”
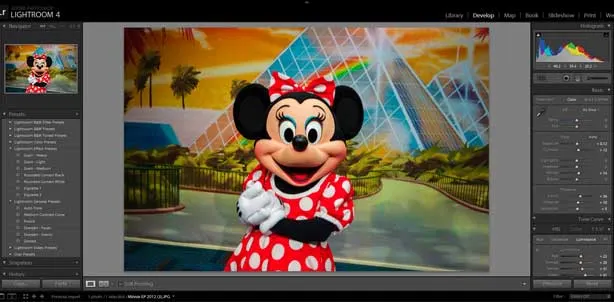
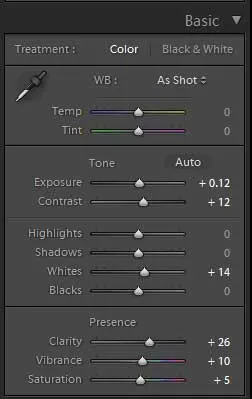
After importing a photo to the stage and clicking on Develop, I can begin to work with the “Basic” sliders to adjust the Temperature, Tint, Exposure, Contrast, Highlights, Shadows, Whites, Black, Clarity, Vibrance and Saturation. Because I’ve received no actual training in the program or even photography, I just slide them around until I begin to like the basic look of the photo. If you don’t like the adjustment, just double click the word and it will reset.
Taking your photos in RAW format will require
a much larger memory card or multiple memory cards!
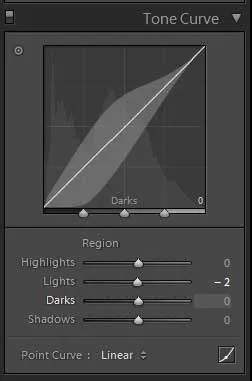
On of the things I’ve read on some photography blogs is that I should begin taking my photos in RAW format instead of the JPEG format that I currently use, so I’ll try that next time I go to Walt Disney World and see how it helps. The reason they suggest that is that it gives you greater control over the colors in the photo before exporting it as a JPEG for web viewing. The program has a lot of adjusters. The next adjuster that you’ll find is the “Tone Curve.”
The Tone Curve gives you more control over the Highlights and Shadows. The Tone Curve controls all the tones of your image. Don’t be intimidated by the curvy thing. You can just as easily adjust those settings with the sliders, if you like.
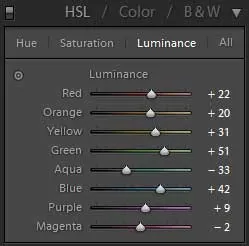
My favorite part of Lightroom is the HSL adjusters. HSL stands for Hue, Saturation and Luminance. The HSL allows you to adjust each color in the palette separately. You can add or take away more red, you can make your blue deeper or brighter or make your purple calm or vibrant. It’s actually kind of fun just to slide them around and see what the photo becomes. This is the area that I played with the most in my photos to adjust the colors
I liked how it makes the photos appear more vibrant and takes away the washed out areas. I probably made Aladdin and Jasmine a little dark in the first photo, but it was my first attempt too. My favorite, and most recent, photo is Minnie on the bottom right. What do you think? What programs do you use to improve your photos?
| Before | After |
 |
 |
 |
 |
 |
 |
 |
 |
 |
 |
 |
 |
Discover more from KennythePirate.com
Subscribe to get the latest posts sent to your email.


Bob R
Tuesday 5th of March 2013
Cory Disbrow from the Disney Photography Blog wrote a good article with some tips for getting started in Lightroom: http://www.disneyphotographyblog.com/new-lightroom-tutorial-china-pavilion/.
Regarding "over-processing", I think it can work out with a lot of character photos, since most of the characters were originally animated creations, so even though your picture may look a little more colorful than real-life, it may make the character appear closer to what you would have seen if you met them in the animated world!
Discover more from KennythePirate.com
Subscribe now to keep reading and get access to the full archive.
Continue reading